7515 Bladed Swim Jig Kit
.jpg?resizeid=6&resizeh=800&resizew=800)
.jpg?resizeid=6&resizeh=800&resizew=800)
.jpg?resizeid=6&resizeh=800&resizew=800)
.jpg?resizeid=6&resizeh=800&resizew=800)
.jpg?resizeid=6&resizeh=800&resizew=800)
.jpg?resizeid=6&resizeh=800&resizew=800)
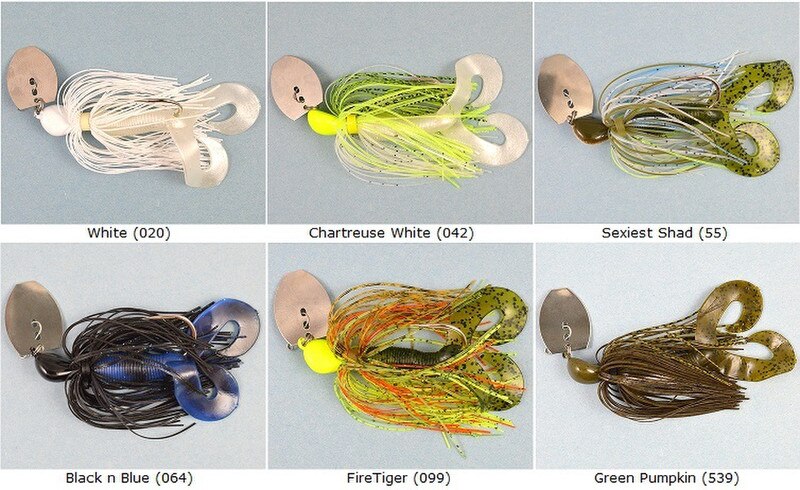
Build your own lure in minutes! Our “Build-a-Bait” Kit comes with everything you need to build a bladed swim jig. These baits are one of today’s hottest lures. All components have been carefully selected for a balanced lure that will catch fish! Choose your favorite color and size and build a bait today! See our video online for help with assembly if needed.
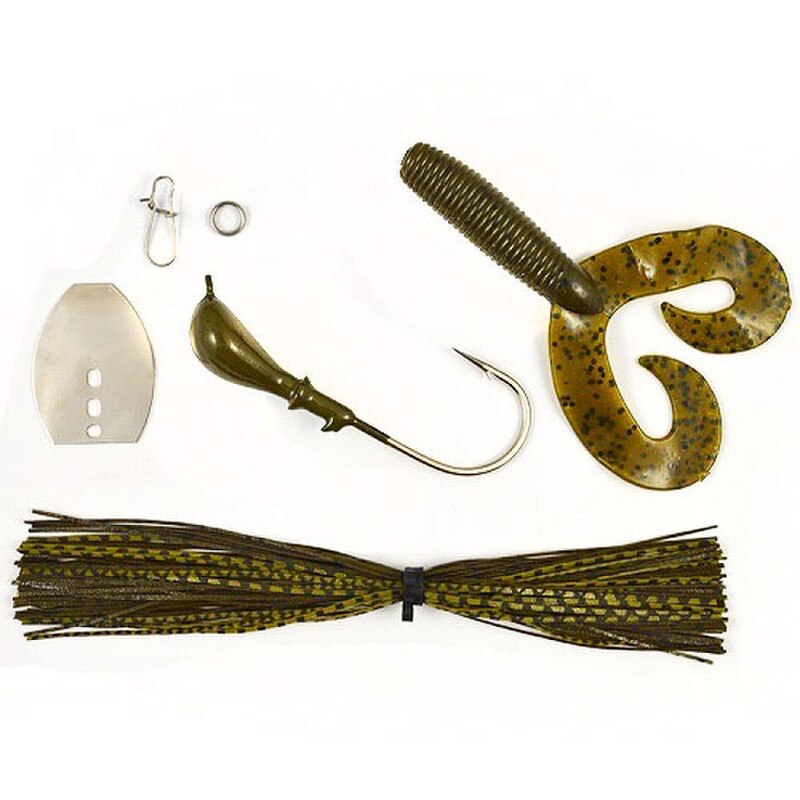
Parts Included:
•Swim Jig
•Jig Dancer Blade (Shaker Blade)
•Split Ring to attach blade to jig
•Snap that attaches to blade as a line tie
•Silicone skirt
•Plastic Trailer (Double-Tail Grub)

Parts Included:
•Swim Jig
•Jig Dancer Blade (Shaker Blade)
•Split Ring to attach blade to jig
•Snap that attaches to blade as a line tie
•Silicone skirt
•Plastic Trailer (Double-Tail Grub)
Here is the step-by-step assembly tutorial for building a fish-catching bladed jig.
Required Tools & Materials
1. Required Tools
- Split Ring Pliers (Essential for opening the rings without bending them out of shape)
- Long Nose Pliers (For holding components and closing snaps)
2. Parts List
- Bladed Swim Jig Head: Choose your preferred weight (typically 3/8 oz or 1/2 oz) with a horizontal line tie/eyelet.
- Jig Dancer “Shaker” Vibrating Blade: These are the specialized vibrating blades that give the bait its signature thump and side-to-side wobble.
- Split Ring (Size 2 or 3): Connects the blade to the jig head.
- Duo-Lock Snap (Size 2 or 3): Attaches to the front of the blade where you tie your fishing line.
- Silicone Skirt: Hides the hook and flares out in the water to mimic baitfish.
- Soft Plastic Trailer (Optional): A swimbait, craw or fluke-style trailer to add bulk and action.
Step by Step Assembly Instructions
Step 1: Attach the Duo-Lock Snap to the Blade
- Open your Duo-Lock Snap using your long-nose pliers.
- Feed the snap through the top two holes of the Jig Dancer Shaker Blade from the back side.
- Snap it firmly shut. This loop is where you will eventually tie your fishing line when you go fishing.
Step 2: Thread the Split Ring onto the Blade
- Take your Split Ring Pliers and wedge the tooth into the Split Ring to separate the wire strands.
- Feed the open split ring through the single bottom hole of your shaker blade.
- Rotate the split ring with your pliers until it clears the hole completely and sits loosely in the blade.
Step 3: Connect the Blade to the Jig Head
- Open the split ring with your Split Ring pliers and slide the horizontal eyelet (line tie) of your jig head into the gap.
- Crucial Blade Alignment Check: Ensure that the front side of the blade is facing forward (convex side facing forward). This creates the side-to-side hunting action.
- Spin the split ring all the way through until it clicks shut, securely trapping both the blade and the jig head eyelet together.
Step 4: Install the Silicone Skirt
- Pro-Tip: Rub a tiny bit of chapstick or lip balm onto the collar of the jig head. This acts as a harmless lubricant so the skirt slides on smoothly without tearing.
- Grab your silicone skirt, keeping the strands even, and slide the rubber collar of the skirt over the hook point.
- Push it all the way up the hook shank until it seats firmly on the jig head's collar. Give the strands a gentle tug to ensure they flare out evenly around the hook.
Step 5: Add Your Trailer
Thread your favorite soft plastic trailer (like a paddle tail swimbait, a craw, or a fork-tail fluke) straight down the center of the hook shank, seating it flush against the skirt collar. Your custom bladed jig is now ready to fish!
Each